
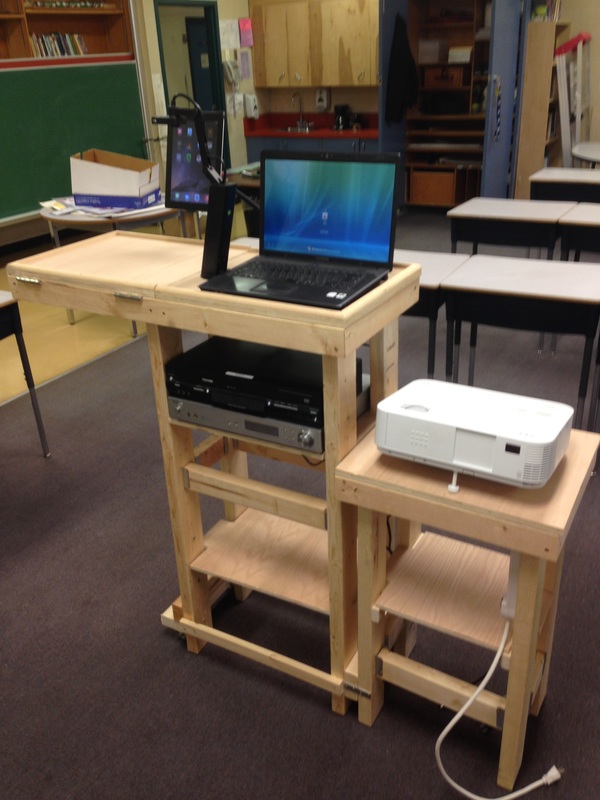
For a few years I have been looking for a piece of furniture to organize the growing number of AV components in my classroom. Although I trying to move away from the "front" of the classroom being the main focal point of my teaching, having my projector and components on a small wheeled cart was not working for me and a more substantial piece of furniture was needed. An ulterior motive was to model a DIY make-it-yourself mindset for my students.
I took my inspiration from the classroom podium pictured below and decided that it wouldn't be too hard to create a purpose built media center for my classroom.
I took my inspiration from the classroom podium pictured below and decided that it wouldn't be too hard to create a purpose built media center for my classroom.
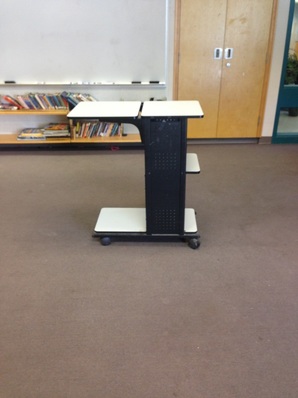 Inspiration |  Final Product |
At the time that I started this project (summer), I wasn't in blogging mode so I don't have any step-wise progress pictures. But, since sharing your projects is an important part of the DIY mindset I thought I'd would post some photos and specifications here.
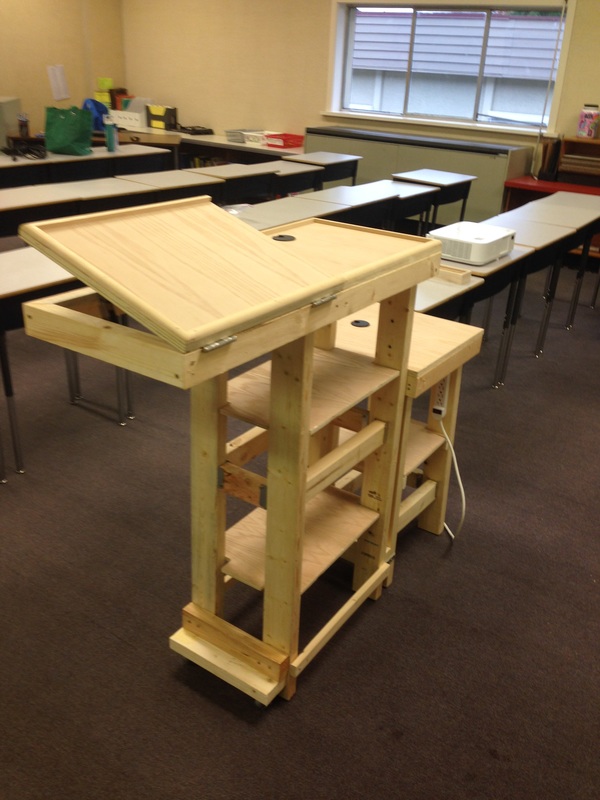
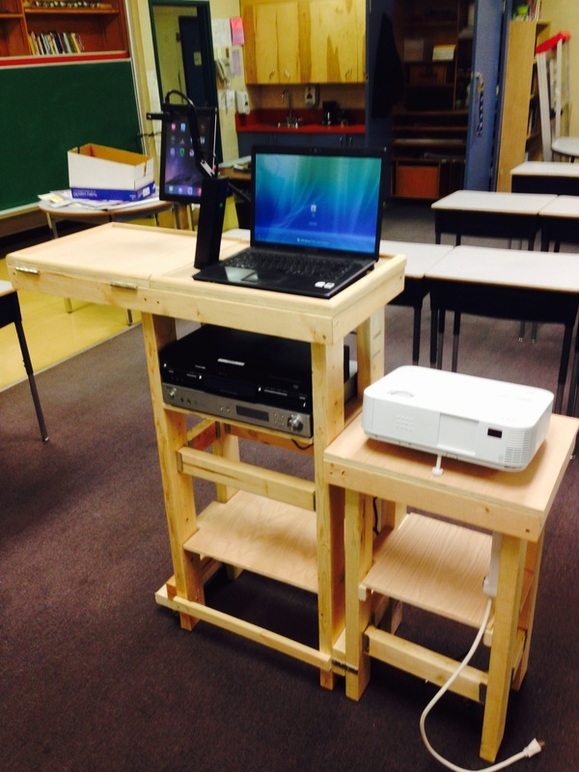
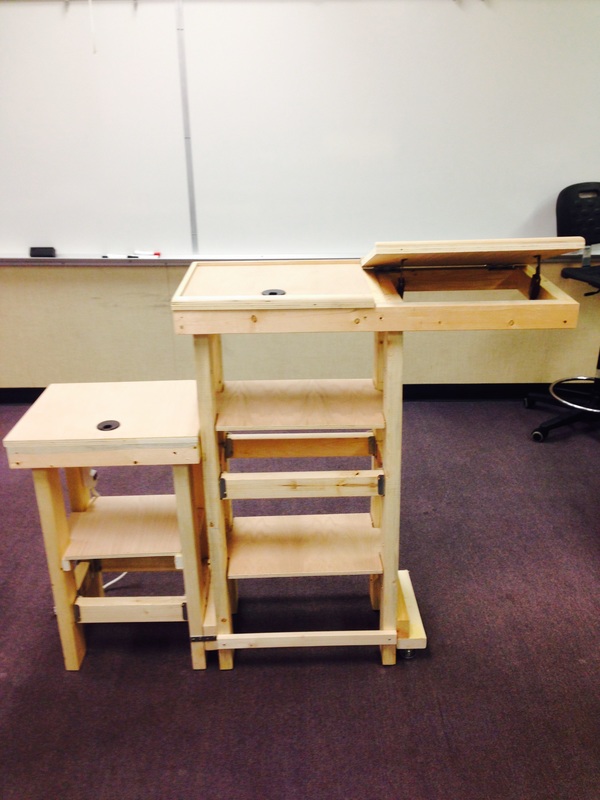
At the outset I imagined a piece of furniture that would neatly house several components, and also serve as a lectern where I could read from teaching notes and use my laptop and document camera at the same time with my projector.
I started the project with a few parameters in mind:
I am not going to share exact measurements here because if you plan to build your own you will likely want to build it to suit your own needs. I am not a carpenter and no super special construction skills were needed aside from using a skill saw, chop saw, screwdriver, level and measuring tape. The only special piece of equiptment needed was a two inch hole cutter bit for my screwdriver which I borrowed. Contact me on twitter if you would like further details not provided here. Some specifications are outlined below.
Since my carpentry knowledge is minimal I used framing brackets in a few areas to join different pieces. I did attempt miter joints for the top piece for aesthetic reasons although a butt joint would probably suffice here.
At the outset I imagined a piece of furniture that would neatly house several components, and also serve as a lectern where I could read from teaching notes and use my laptop and document camera at the same time with my projector.
I started the project with a few parameters in mind:
- It should serve as a standing desk and it should be the right height to use as a comfortable writing surface when standing.
- There should be a shorter platform at the right height for my projector to sit on.
- It should have space on top for a laptop, document camera and small whiteboard.
- It should have shelving that fits my other AV components (stereo receiver, speakers, DVD player, nintendo Wii)
- There should be spaces to run cables to keep them reasonably neat.
- It should be stable.
- Misc lumber (2 x 4" and 1.5 x 3" boards and a few small sheets of smooth plywood.
- Quarter round molding for the table-top edge
- Various wood screws
- Wood glue
- Framing brackets
- Plastic grommets to run cables through.
- Metal shelf pegs and inserts for drilled holes
- Metal casters (wheels)
- Toyboy lid supports (for the lift-up top piece)
I am not going to share exact measurements here because if you plan to build your own you will likely want to build it to suit your own needs. I am not a carpenter and no super special construction skills were needed aside from using a skill saw, chop saw, screwdriver, level and measuring tape. The only special piece of equiptment needed was a two inch hole cutter bit for my screwdriver which I borrowed. Contact me on twitter if you would like further details not provided here. Some specifications are outlined below.
Since my carpentry knowledge is minimal I used framing brackets in a few areas to join different pieces. I did attempt miter joints for the top piece for aesthetic reasons although a butt joint would probably suffice here.
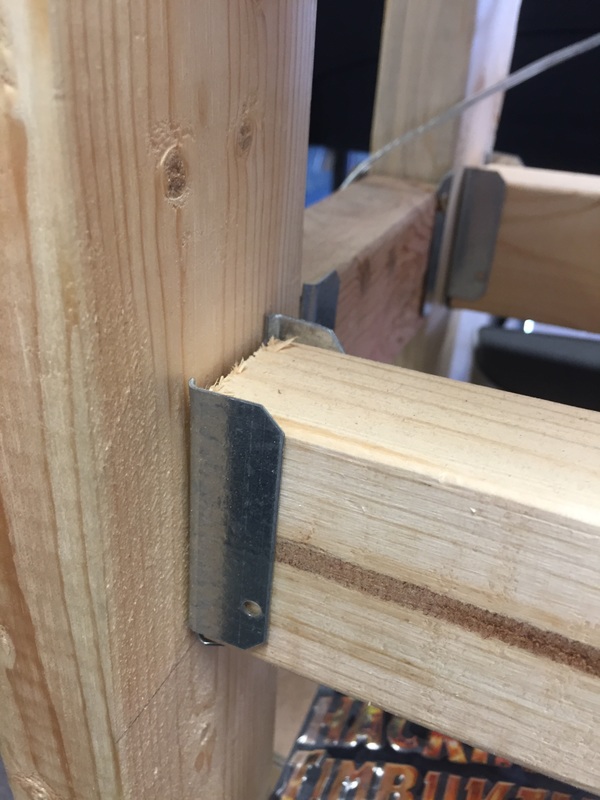 Framing bracket | 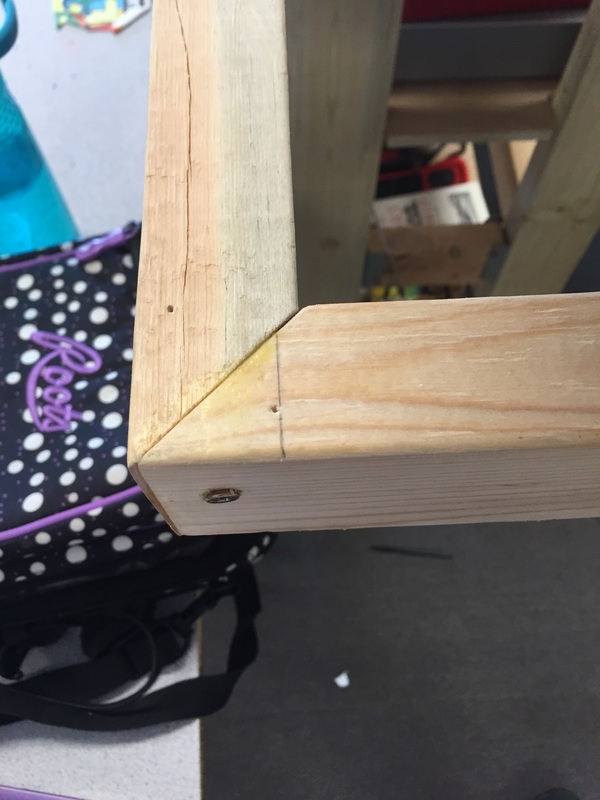 Miter joint |
I wanted it to be easily movable so some hidden wheels were added to one side. Holes were cut in the table top piece and finished with two inch plastic grommets for cable management. I drilled holes and added metal inserts to insert shelf pegs.
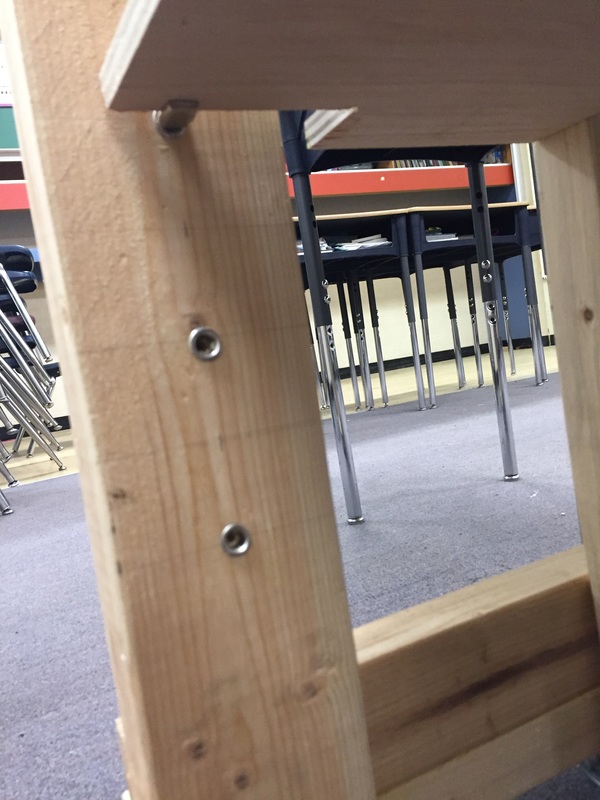 Shelf pegs | 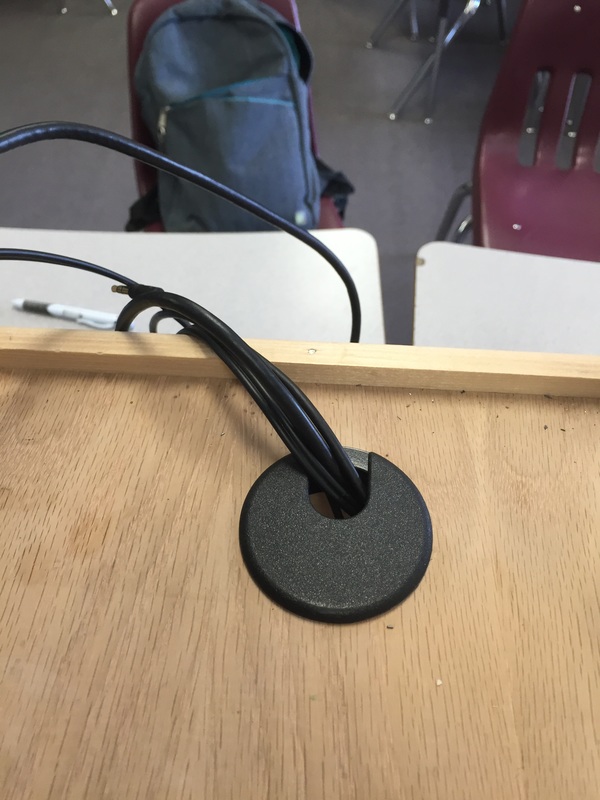 Cable cut-out |
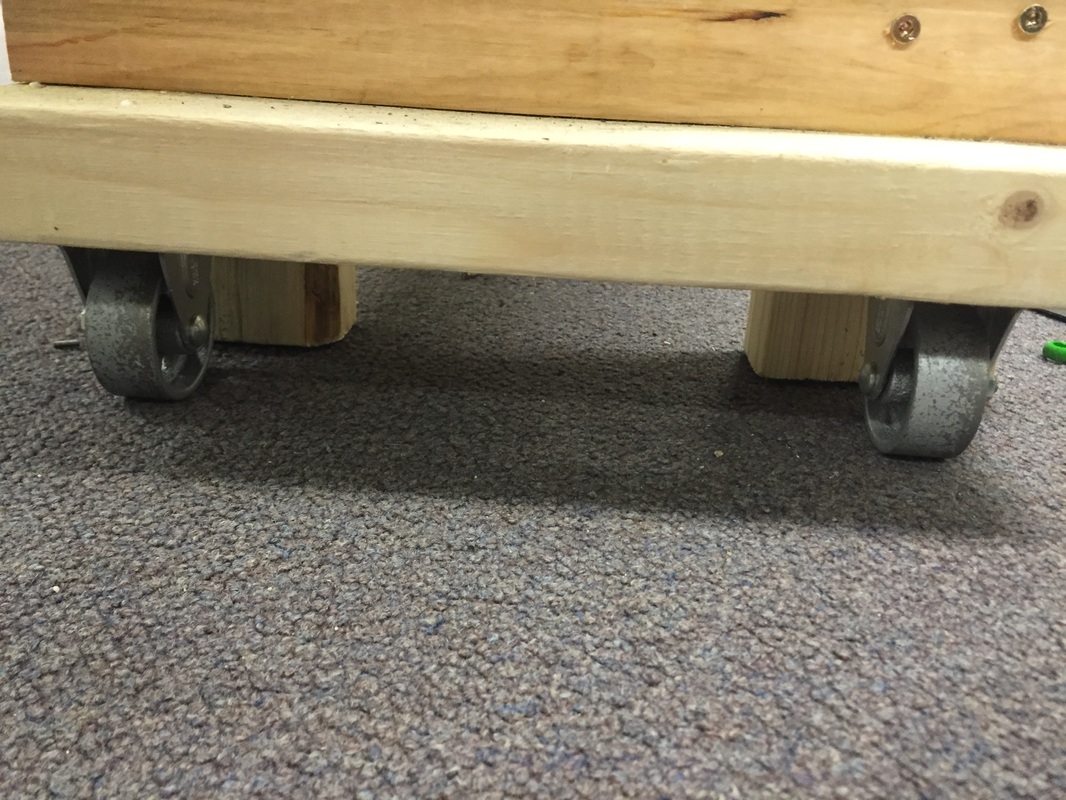
Metal casters
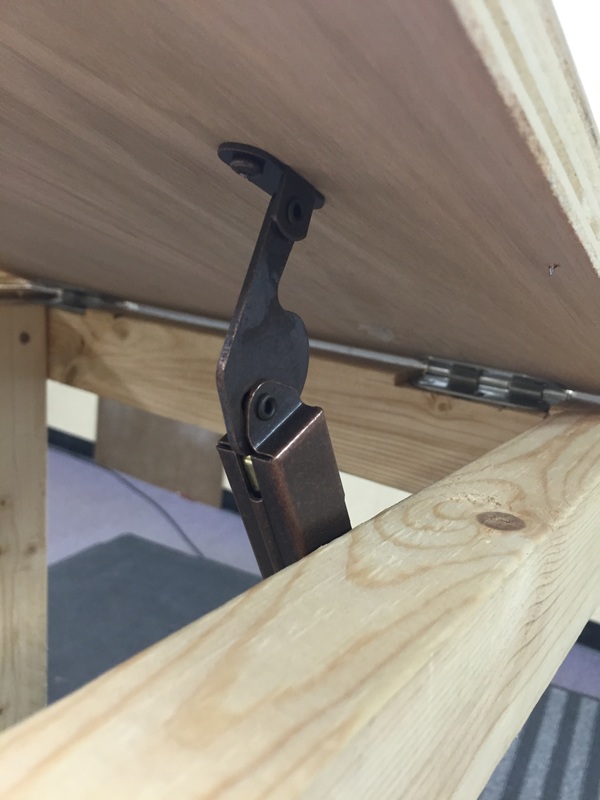
I thought it might be easier to write and hold notes if the table-top was angled so I added hinges and used toybox lid supports to create a flip-up surface.
 |  |
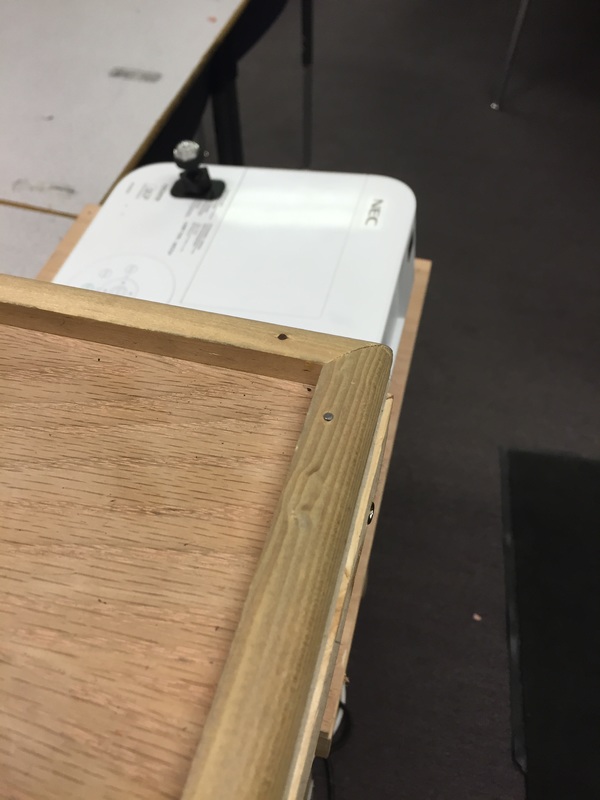
I didn`t want pens and paper sliding off so I used some quarter round molding along the edges of the table-top.
The finished product! It`s not pretty, but it`s functional. This summer I may take it home for some paint and to shorten it by an inch or two (my estimation for a comfortable height was a tad off).
 |  |
